
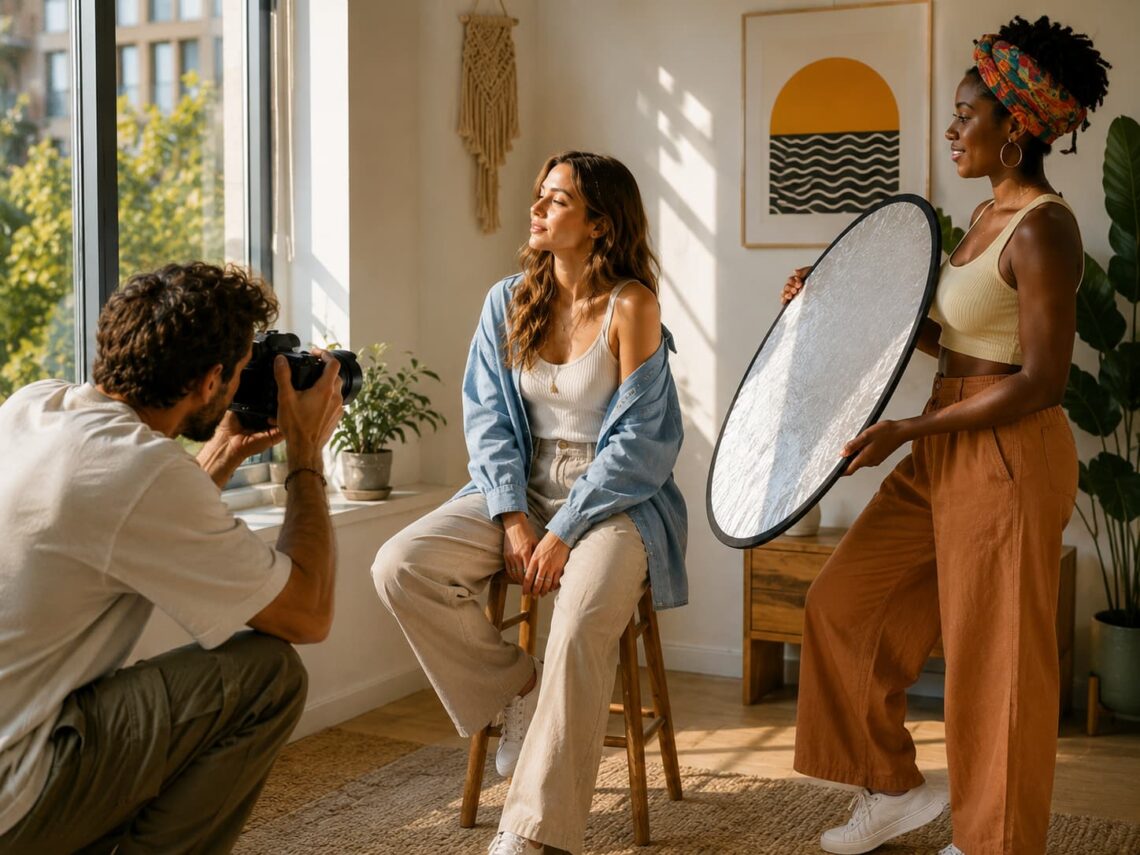
Ask a room full of portrait photographers what their favorite light source is, and a surprising number will point not to an expensive studio strobe but to something everyone already owns: a window. Soft daylight streaming through a pane of glass is one of the most flattering, versatile, and forgiving light sources in all of photography, and learning to use it well may be the single most valuable skill a beginning portrait photographer can develop. It requires no flash, no costly equipment, and no complicated setup. It asks only that you learn to see light and understand how to place a person within it.
The reason window light is so prized comes down to a single quality: softness. A camera’s built-in flash, or a bare bulb, is a small, hard light source that fires straight at your subject, producing harsh shadows, ugly bright spots on the skin, and that washed-out, deer-in-headlights look everyone recognizes and dislikes. A window does the opposite. As daylight passes through the glass and spills into the room, it becomes large and diffuse relative to your subject. This large, soft light wraps gently around a face, producing smooth, gradual transitions from light to shadow instead of abrupt edges. It flatters skin, softens imperfections, and sculpts the face with a subtlety that a direct flash simply cannot match. The bigger and softer the light relative to the subject, the more gentle the result, which is exactly why a big window beats a tiny flashbulb every time.
Not all window light is equal, though, and the first thing to understand is the difference between direct and indirect light. A window with harsh sunlight pouring directly through it acts almost like a hard spotlight, throwing strong, high-contrast shadows and often the distracting shape of the window frame across your subject. This can be used creatively, but for classic flattering portraits you want indirect light, the soft, even illumination from a window that the sun is not shining directly into. A north-facing window is famously beloved by portrait painters and photographers alike precisely because it delivers this beautiful, consistent, indirect light for most of the day. If your only option is a window blasting with direct sun, you can tame it easily: hang a sheer white curtain, a piece of thin fabric, or even tracing paper over the glass, and it instantly transforms that harsh beam into a large, soft, diffused source.
Once you have good light, the real craft begins, and it is all about the position of your subject relative to the window. This single choice changes everything about the mood of the portrait. If you place your subject facing the window, with the light falling flat onto them, you get bright, even, low-contrast illumination that is cheerful and clean but somewhat flat. The more interesting and dimensional approach is to turn the subject so the window is off to one side. This side lighting is the workhorse of portrait photography. As the light rakes across the face from the side, it illuminates one half while letting the other fall into gentle shadow, and that interplay of light and shadow is what creates a sense of depth, shape, and three-dimensionality. A face lit purely from the front looks like a flat mask; a face lit from the side looks like a sculpture.
You can control this precisely by adjusting the angle. Turn the subject so the window is roughly forty-five degrees to the side and slightly in front of them, and you produce a classic, professional look with a soft triangle of light on the shadowed cheek. Watch the shadow cast by the nose as you rotate your subject; photographers use its shape to define classic lighting patterns, from a small loop of shadow beside the nose to the dramatic little triangle of light on the cheek known as Rembrandt lighting. There are no rigid rules here. The best way to learn is simply to slowly turn your subject and watch how the light and shadows move across their face, stopping when it looks beautiful.
The one problem with side lighting is that the shadow side of the face can fall too dark. The elegant, no-flash solution is a reflector, and you do not need to buy one. A large piece of white foam board, a white sheet, a piece of white poster paper, or even a bright wall placed on the shadow side of your subject will catch the window light and bounce a soft fill back into the shadows, opening them up and reducing the contrast to taste. Move the reflector closer for a brighter fill, further away for a moodier, darker look. This simple trick gives you complete control over the balance between highlight and shadow, all with light that was already in the room.
A few final practical notes make everything come together. Because indoor light is dimmer than the outdoors, you will often be working with wider apertures and slower shutter speeds, so keeping your camera steady and your subject still matters. Always set your exposure for the brightly lit side of the face rather than letting the camera average everything out, which protects the highlights and keeps skin tones natural. And look for the catchlights, those tiny reflections of the window in your subject’s eyes; they are the sparkle that makes a portrait feel alive, and window light produces gorgeous, large, natural ones.
The deeper lesson in all of this is that great portrait lighting was never really about gear. Some of the most stunning portraits ever made were lit by nothing more than a window and a photographer who understood how to use it. Before you spend a cent on lights, spend a few afternoons with a willing subject, a window, and a piece of white card, simply moving them around and watching what the light does. You will learn more about the fundamentals of portraiture from that free, endlessly patient light source than from any amount of equipment, and you will come away with photographs that look anything but cheap.